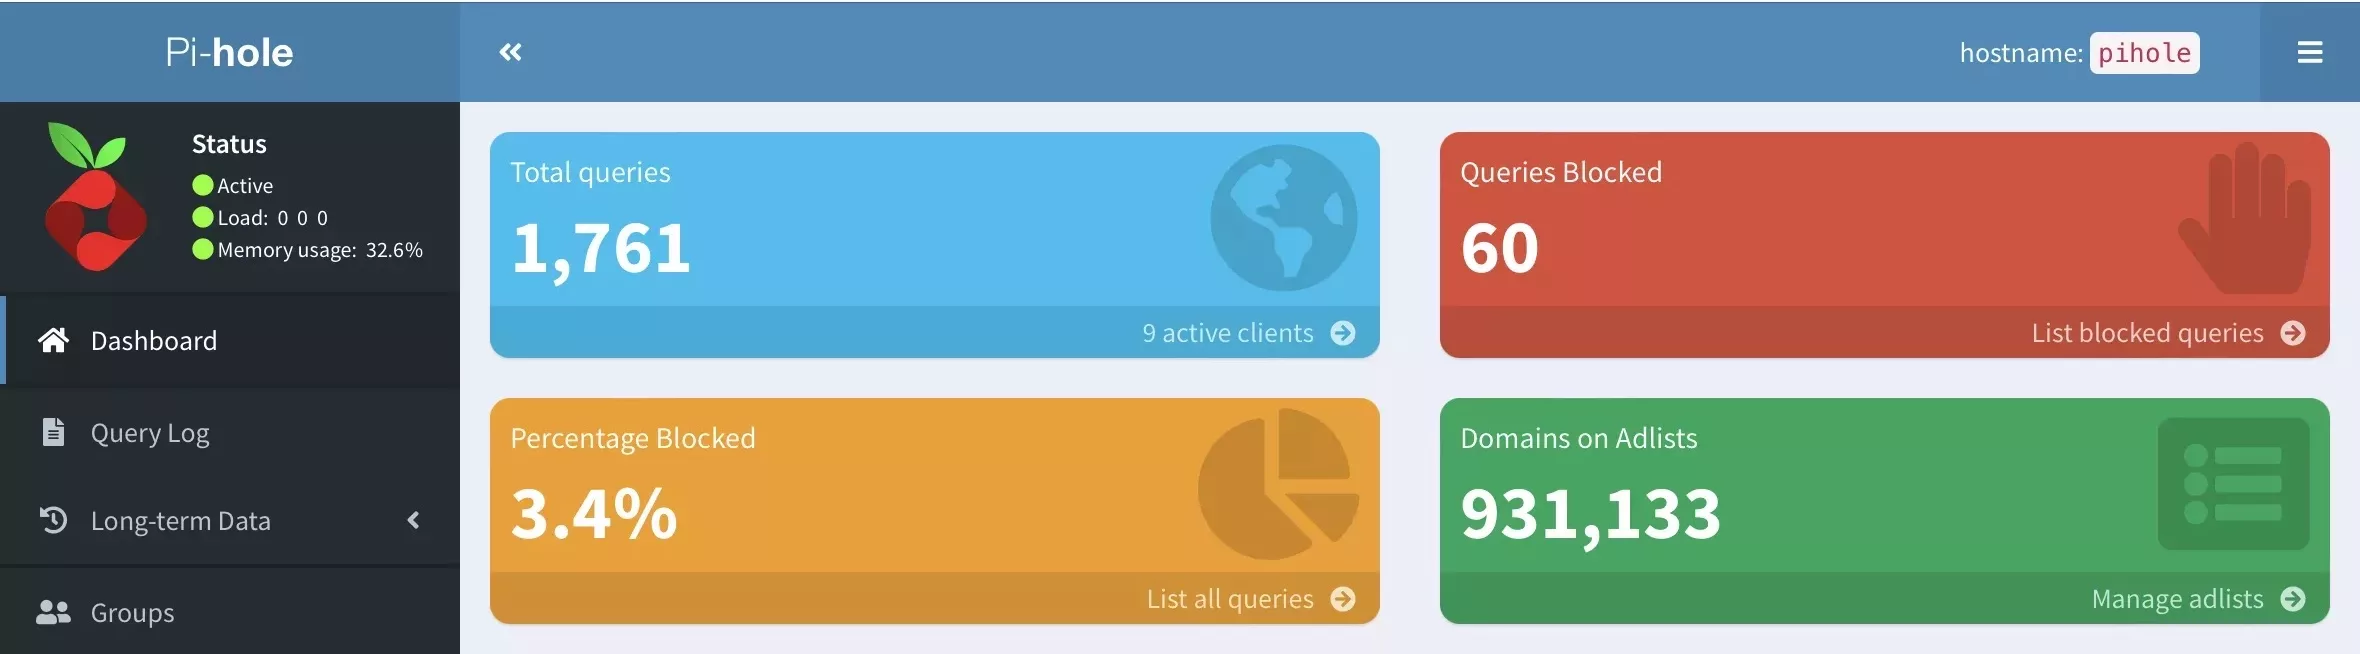
Pihole. it‘s brilliant. It kills ads and tracking – dead. The server deploys in 5 minutes and offers an extremely reliable method of increasing privacy, reducing ads and speeding up browsing.
For a long time, I have been running uBlock Origin as a plugin on my browsers but it did not cover some Apps on my phone and also the rest of my family were not such converts to privacy.
As a centralised solution, I tried nextdns.io but we make so many queries in a month that I would have had to pay $20 per year.
Where‘s the fun in that, I thought….🤣
And so, attention turned to Pihole. With a number of Ubuntu VMs in my environment, I sacrificed one for Pihole. It was running and effective in minutes. So I sacrificed another! After this, my thoughts turned to how I could run one that is always on as my VMs at home are on Hyper-V servers and need rebooting once a month.
Cue a shower moment where I realised my second Oracle Cloud free tier has two lightweight hosts and, with the OpenCanary hosted there, I could built out a Pihole server.
Deploying a new host takes minutes but in the OCI environment, it‘s important to remember the following:
- Host deployment (easy)
- Network Security Group (allow all ports and protocols inbound)
- Subnet security (prescribe UDP53, TCP80 and TCP443 inbound)
- The host may need iptables (Ubuntu certainly does) to allow traffic inbound
The default included list is pretty good but feel free to add the following list as well:
https://raw.githubusercontent.com/hagezi/dns-blocklists/main/domains/multi.txtThe result is a very capable adblocker and privacy guard.
With the Pihole being in the Internet, I wanted a solution with HTTPS. TLS is important! However I managed to trash a Pihole instance working to configure Lighttpd with ACME and Let‘s Encrypt certificates. It was quicker to deploy a new host than to back out the changes (welcome to the Cloud!!).
The Pihole documentation delivered some clues and I therefore reconfigured Lighttpd to listen on port 1080 and brought Caddy into the picture.
Caddy. Fantastic! A HTTP stack that focused on TLS provisioning and with a simple reverse proxy. Colour me converted….!
It will actually create new certificates for defined domains once you configure it correctly; the Pihole documentation to explain this is very average and so I give more detail here.
Let‘s assume you‘ve changed the Lighttpd port and restarted that service. Install Caddy as per their instructions for your platform and then ensure it is not running. One of these commands should help.
sudo caddy stop

sudo service caddy stop
Next, you need to edit the Caddyfile. You may want to rename the original.
sudo nano /etc/caddy/CaddyfileThe content is quite simple to enable a reverse proxy, you define a valid DNS record to be forwarded and send it to your localhost. In the example below, it‘s going to port 1080 – ensure your Lightttpd is listening on that port.
pihole.yourdomain.com {

  reverse_proxy localhost:1080 }
You‘re now a single command away from having a good TLS stack in front of your Lighttpd server (which does not need to be open to the Internet).
sudo caddy runCaddy, most excellently, will get you a certificate for that domain and then sit with the server running so you can test it. If it works, CTRL-C and start your Caddy (sudo service caddy start).
It‘s time to enjoy your Pihole, the TLS stack and of course your Bitwarden-generated password (sadly limited to 128 characters). If you have not changed your Pihole password, do this from the command line:
sudo pihole -a -p passwordHave fun with your Pihole! 👍